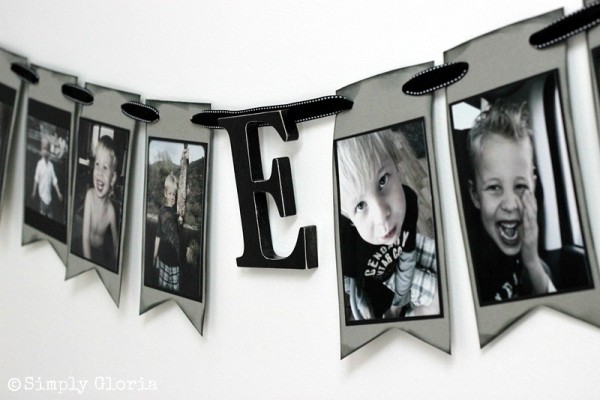
Showcase your favorite memories across a Portrait Banner! Great for draping your treasured decorated moments at your next celebration for everyone to see– and to enjoy!
 It’s been awhile since I’ve posted something crafty. (Chevron Burlap & Printable… in case you missed it!)
So, I wanted to share with you how easy it is to make a Portrait Banner for a loved one.
As you know, I enjoy adventuring in the kitchen most of all. And since my craft room is under construction… I haven’t quite been so crafty. I’d have to gather my craft supplies from one direction of my house to another and loosing half of them in between! Does that ever happen to you?
But…. I decided to take some time and make my little man a banner for his (7th!!) birthday celebration! Along with making his birthday cake!
All of the pictures I picked out of Easton were from birth till now. It really makes me realize how fast he has grown!
This banner is sturdy enough that it will be hung up in his room for the rest of the year!

You really do not need to be a crafty kind of person to make a Portrait Banner.
Trust me. This is simple.
You can customize it any way and for any one!
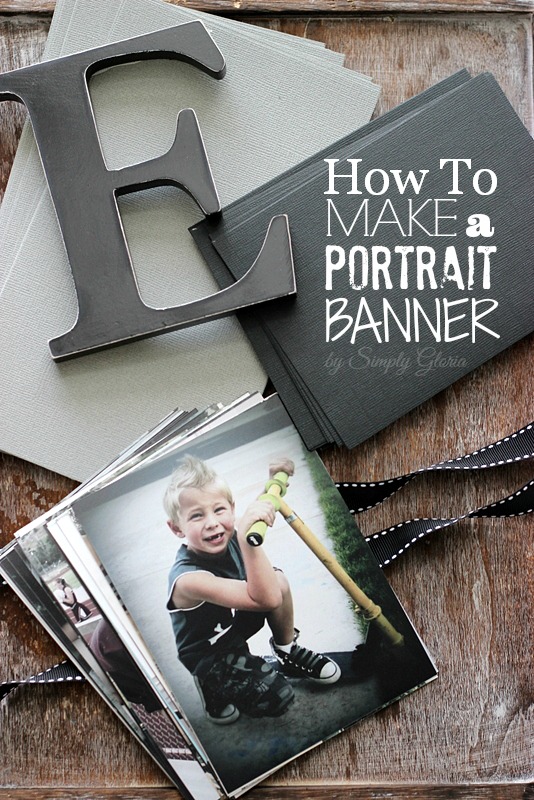
*Note: This is a 3 foot banner and will hold 16 pictures. You may customize your own size and shape of banner. Materials you’ll need for the banner:- 16 pictures, 4 inches by 5.3 inches (Walgreens had cut mine to online Internet length. But you may choose a true 4×6 cut. You may have to make adjustments on the black paper for that size of picture to fit.)
- 3 yards of ribbon
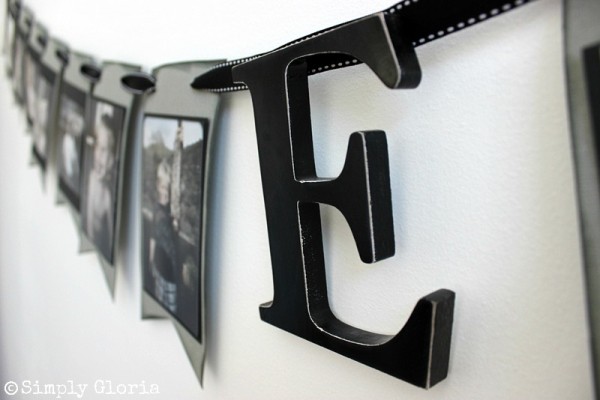
- 1 painted letter (4 inches by 5 inches, or your choice of size) placed in center
- 16 gray cardstock paper cut to 4 and 3/4 inches by 8 inches
- 16 black cardstock paper, cut 4 and a half inches by 5 and a half inches
- acid free glue (for pictures onto the black paper)
- hole puncher (to weave the ribbon through the gray paper)
- black ink pad (optional)
- heated glue gun, to glue the letter on the ribbon (and black paper onto the gray paper, optional)
- scissors
- paper slicer (optional)
- Fold the ribbon in half and find your center. Lay out flat and use the hot glue to attach the letter on the ribbon.
- Use scissors or a paper slicer to cut the black and gray papers.
- Use the acid free glue to attach the pictures to the black paper.
- Glue (may use hot glue or the acid free glue) the back of the black paper to the front of the gray paper up and position to 1 and a half inches from the top edge of the gray paper. And, 1 inch from the bottom.
- On the bottom (only) of the gray paper, cut with scissors at a 45 degrees angle on the left and right side.
- Optional step: Take ink pad and lightly scrap up against the edges of the gray paper, by causing a shadowed edge.
- Using the hole puncher, punch in two separate holes up at the top of the large gray paper to weave the ribbon through.
- Weave the ribbon through and space all the pictures out evenly on each side of your centered letter.
- Leave about 5 inches on the ends of the ribbon. Finish by tying a knot on each loose end.
- Hang the banner and celebrate!

This is so much fun for birthdays!
Have a blast creating, my friends!
For all of you chocolate lovers… a recipe is coming for you this week!
*****On YOUR birthday, what is your favorite way to celebrate?*****


WOW! Gloria, this is so gorgeous and such a great idea, I absolutely love it!
Chelsea @chelseasmessyapron recently posted…Peanut Butter Cheesecake Overnight Oats
Thank you so much, Chelsea! It was fun to make. (=
This is adorable!! I love the bunting and how you used a letter, too! So creative. I have to make one of these for my daughter and my 4 kitties!! HA!
Marti
Marti recently posted…Sew Organized! Flower Pot Organization
Incorporating a letter is fun… and it gives a little bit of personalized bit to it. Thank you, Marti… and, it’d be fun to do pictures with all of your Calico’s!
Yes it would, my kitties love it when they get to craft with me! lol
Marti recently posted…Two Colored Felt Flower Tutorial
What a great idea!! I have to make one of these banners.
Shea @ Dixie Chik Cooks recently posted…Spicy Buffalo Patty Melts
Thanks, Shea! Have a great day!
This is so adorable! I used to be somewhat crafty and artistic, but it’s taken a major backseat to kitchen activities! This is inspiring and a gift that people would love!
Marcie recently posted…Butter Lettuce Citrus Salad with Avocado Shallot Dressing
Marcie, that’s exactly how I used to be. I used to go out on scrapbooking adventures with the girls and stay up all night putting pages together. Now, I do them all online. So, it felt good to get out the pictures and make something to hang up on the wall. Have a great rest of your week, my friend!
Oh my goodness Gloria, I love this portrait banner! It’s beautiful and what a special way to showcase the memories of your lil man from birth – I’ll bet Easton will love this hanging in his room 🙂 Pinning, thanks so much for sharing and the inspiration – I would love to make this for my lil guy some day too 🙂
Thank you so much, Kelly! Easton looks at it every night before he goes to bed. (Makes me happy he likes it.) Enjoy the rest of your day! (=
I LOVE this Gloria! It turned out just beautifully! What a great way to showcase all those great pics too 🙂 Pinned!
Trish – Mom On Timeout recently posted…Roasted Marsala Carrots
Thank you, Trish! I was just happy to get the pictures out of the computer and put them up so we can see them. (=
Great job, Gloria! I love easy craft projects like this. I especially love how you included the painted letter.
P.S. – Can’t wait to see your chocolate recipe!
Ashley | Spoonful of Flavor recently posted…Granola Trail Mix
Ashley, I think I have a letter addiction. Every time I’m at a craft store, I walk over to the letter isle… and grab one. I have some that I’ve forgotten about and have bought the same ones! I’m so bad! Enjoy the rest of your week!
Easton is totally adorable Gloria! And I love this portrait banner, such a fun and creative idea. Great way to showcase photos. Pinned. Have a great rest of the week my dear. 🙂
Thank you so much, my friend! It was really fun to make. I love doing things like this for my nieces and nephews for their birthdays, too. They just looking at themselves while they’re hanging out in their bedrooms…hehe. Have a great rest of your week, Anne! (=
I love this! I can see it being a great gift for the very special people in my life. Thanks for the idea 🙂
Donna recently posted…“Let it Snow” – A Photo Journal
I’m so glad you like it, Donna! Have a fabulous Thursday! (=
Ok, I have a big blank wall that I want to do this to. Great “How To!”
tahnycooks recently posted…Salvation
Tahny, that would be so fun to make with your whole family on it… great idea! xo
I love making banners! I have been wanting to do a photo banner with old cabinet cards, but now I think Ilike this idea better! Thanks for the tutorial!
Paula recently posted…Sweet Scrap Paper Valentine
Thanks, Paula! I love old cabinet cards. Have a wonderful Thursday! (=
I Love this idea and how you make it look so easy to put together! I’m featuring it in the morning on OneKriegerChick from the Hit Me With Your Best Shot Link Party. Thanks for linking up and hope to see you again this Tuesday at 7!
Happy Day!
~Ariean http://onekriegerchick.com/
Ariean @OneKriegerChick recently posted…2014 Word of the Year
Thank you so much, Ariean! You girls rocked that first party, congrats! Have a great weekend!
What a fantastic idea! I think this would be a super cute way to add personality to our bare hallway. Thanks for the detailed instructions!
Brandi recently posted…Preschool Style: Tough Little Valentine
Great idea to do in the hallway, Brandi. That would look really great with down a long, bare wall… now I’m going to have to do that! Hope you’re enjoying your weekend!
This is such a fun idea Gloria! And oh my gosh, that boy of yours is too cute! I love the pic of him with the scooter, no front teeth + fauxhawk!
Allie | Baking a Moment recently posted…Citrus Galette for The Kitchenthusiast
Thank you, Allie! I think that has to be one of my favorites… when he had no front teeth and was always worried about his hair. (Although, he is still that way with his hair…. always making sure it’s perfect!)
Gloria recently posted…Show Stopper Saturday Link Party, Featuring Healthy Recipes
This is fantastic! I love it and can’t wait to use it for my son’s birthday party! Thank you!
Mommy Mafia recently posted…ABC World News Wants ME to Make Dinner? ME??
My son’s 18th is coming up soon, this would be perfect. Great idea, thanks
Julie recently posted…How to insert Elastic into Jeans Waistband
this is an amazing idea if any body else has any similar ideas please post the links asap xoxoxoxoox please quick
What width of ribbon did you use? I love this idea – I’m going to make one for my son’s high school graduation party.
I used about a half inch width ribbon. That would be a great idea for graduation… guess I had better get one ready for my middle son graduating in a few months, too! (Time goes by so fast!) 🙂
Nice tips. I will surely use it while making Banners.
Thanks for sharing it. It was very informative.
This is a wonderful idea for high school graduation which is what I am doing. I wanted to incorporate pictures and fun printables. This gives me some ideas, thanks!