When it comes to making over an old piece of furniture, you need to allow yourself to have THE VISION and make it your own!
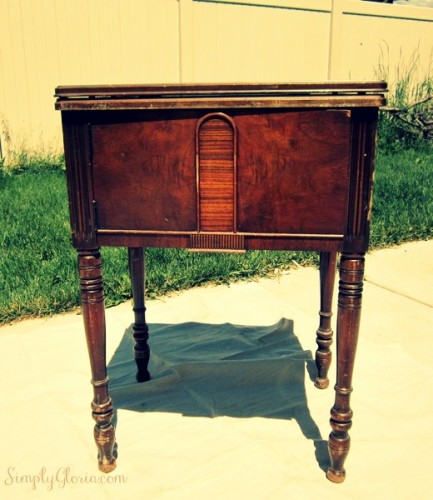
You may even walk right past something that looks old, banged up and UGLY!
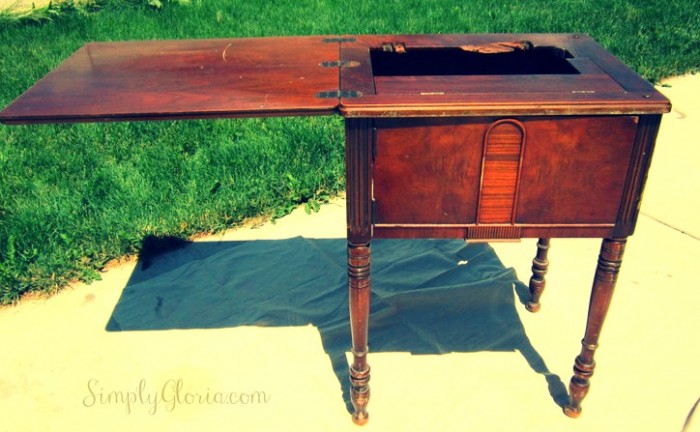
I came across this old sewing machine table (with the 1970’s sewing machine still inside!) at the local D.I. (Utah’s thrift store). It needed some love!
I instantly HAD to take it home! My husband thought I was crazy. But of course, I had to spell out THE VISION to him…but he still didn’t see it. I took it home anyways (and for $10, it was definitely a great buy.)
So, to have the VISION of something like this…you have got to use your imagination. I was not looking for a sewing machine table nor would I use it as that. (I do love to sew, though!)
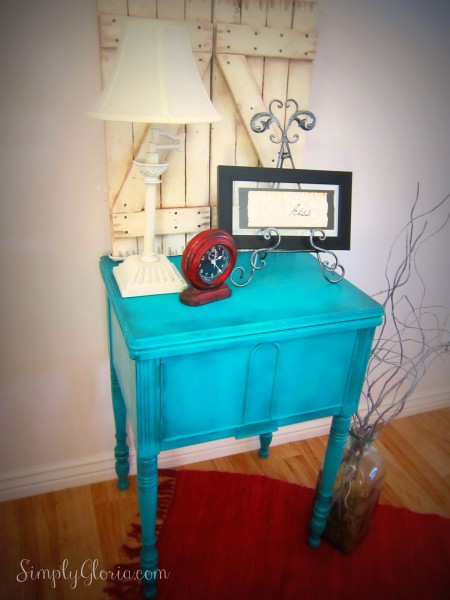
I wanted to use it just as a little table, maybe put our massive 19″ television on top of it.
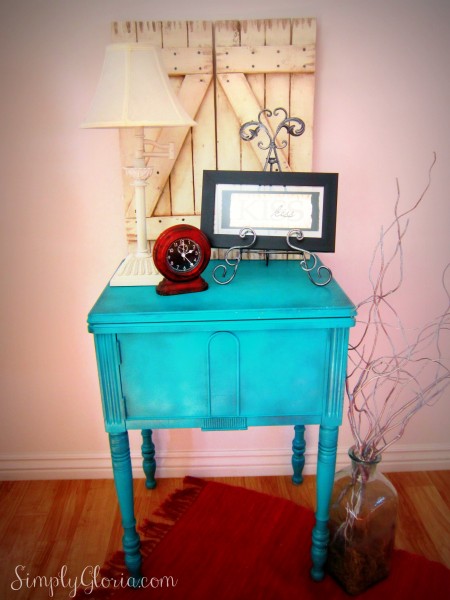
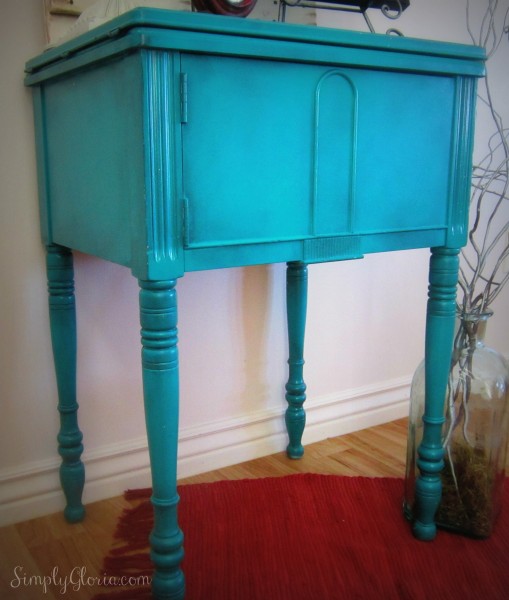
I ended up just folding the floppy side shut and started painting. SPRAY paint, that is! Seriously, how easy is that?!
I didn’t have to sand it down at all. Isn’t that the best part?! *Note: If you do NOT want any of the hardware painted (hinges, etc) take them off or tape them very well. I chose not to…I was being a little inpatient.
I first started with an all-purpose {Primer Spray}. I did two coats…just to make sure!
After allowing it to dry for a couple hours…I then started spraying the {paint color} I chose. I used 2 cans. I then let the paint dry in between coats. And allowed it to completely dry overnight.
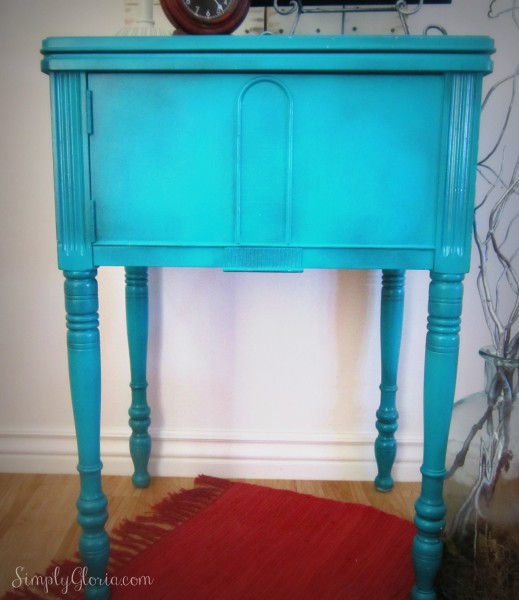
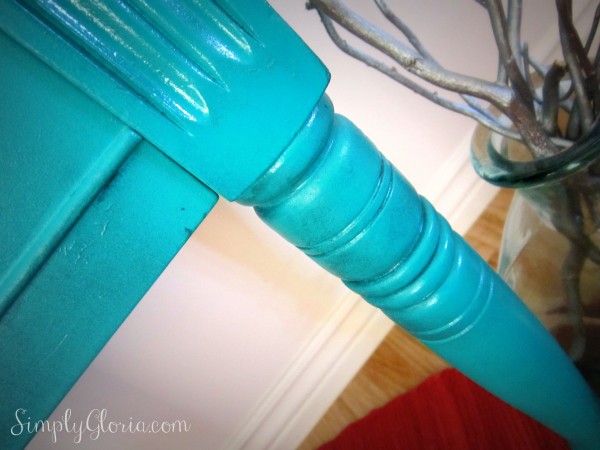
I wanted more of an antique look. I mean, look at those legs! They needed the attention they deserve.
I decided to antique and distress the legs. Along with the top edges with some {black wood stain}. All you need to apply it with, is an old piece of (dry) cloth…in my case, it was my husband’s socks.
Make sure you shake the can of stain very well before opening. Dab a small part of the cloth into the can of stain (or even what’s on the inside of the lid, to start with). And work the cloth around and INSIDE all the grooves of the wood. Use another piece of (dry) cloth to wipe and dab the excess in the same direction. (If you’re wiping the stain horizontally, swipe the excess the same way.)
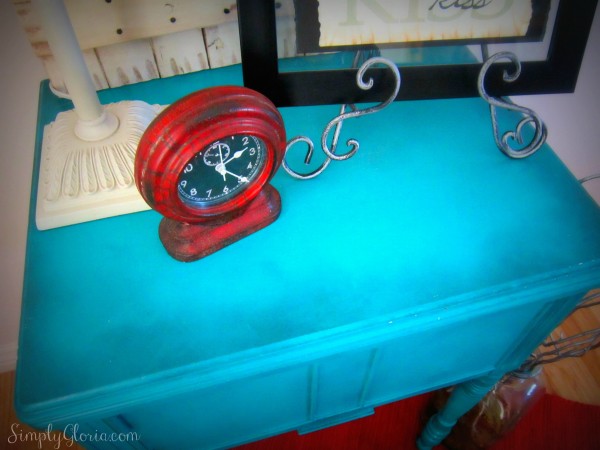
I did the same technique with the stain on the top. But instead, you’d want to start on the edge and work your way towards the middle…don’t go all the way, remember just the edges. Keep dabbing–not rubbing the stain. Especially on the FLAT top surface. Alternate with the clean cloth as you’re SHADING in the areas. Allow the stain to dry for at least 24 hours. No need to seal it with anything…it already has it in it!
I love pieces with a lot of detail in them! Especially all the grooves and knobs. Don’t you think it makes it more interesting and full of character?
Make a piece of whatever you find a part of who you are! Don’ t be afraid to be BOLD and full of personality!
*Note: Notice the antique distress shutters sitting on top of my table? I thought I’d share that as well…I got them on {Etsy} and painted them myself!

Very shabby chic! I love this color! As a kid I always wanted to paint wood furniture growing up by my mom would never let me! Now I white wash everything!
Reba- Not So Perfect Life recently posted…Oatmeal Quick Bread aka Toast to Go- Vegan
Thanks, Reba! Back then, we never saw bold bright colors on wood furniture. But it sure is fun to put a whole fresh spin on the stuff from that era! (=
Gloria recently posted…Cookies And Cream Bars
LOVE LOVE LOVE your blog. I am so excited. Sunni
Thanks, Sunni! You’re so sweet! (=
Gloria recently posted…Basic Cream Sauce